Creating a simple server control
Introduction
A custom server control may be dropped onto one of your web forms, just
like the built in controls in the toolbox, however, the functionality of the
control is determined by the control author. For this tutorial we will
develop a simple server control which behaves like a literal, except the
content of the literal can be arbitrary text, loaded from a file.
Link to the complete annotated source code for this
control.
Concepts
A server control is basically a class derived from one of the existing
controls or one of the base control classes. The class will expose a set of
properties which can be accessed through the Properties task pane or
programmatically.
The class may have an associated designer class which provides specific
functionality which is used by the developer while designing a form using
the control.
Warning
When developing controls and associated test programs the
solution(s) need to be rebuilt between each test. Also, a
known bug in VS2008 sp 1 causes the design time view of a
web page using your control to fail. The only reliable
solution is to close the page, close VS2008, re-open VS2008,
rebuild and reopen the page.
Basic control design
We will develop a class called 'FileLiteral' which has a 'Text' property,
used to display text when no file is linked to the control, and a 'contentFile'
property used to specify an application relative data file containing the
run-time text content for the control.
Step 1 - create the basic control
- Create a new C# project in Visual Studio 2008, of type Class
Library, called FileLiteral, in a suitable location on a local drive.
- Change the namespace declaration to FL.Web
- Add a Reference to System.Web;
- Change the class
declaration to:
public class FileLiteral: WebControl
- Now add two public string properties for Text and contentFile based
on private variables:
private string _Text = "";
public string Text
{
 get { return _Text; }
 set { _Text = value; }
}
private string _contentFile = "";
public string contentFile
{
 get { return _contentFile; }
 set { _contentFile = value; }
}
- We can now add a Literal object in the class and constructor which creates adds the Literal object as a
child of the control. We add a Load event handler too:
 protected Literal _literal = new Literal();
public FileLiteral()
{
  Controls.Add(_literal);
  Load += new EventHandler(FileLiteral_Load);
}
- Just to get things moving we can use the Load event handler to set
the Text of the literal to the value of the Text and contentFile
properties. We will replace this with more functionality later:
 protected void FileLiteral_Load(object sender, EventArgs e)
{
  if (string.IsNullOrEmpty(Text) &&
      string.IsNullOrEmpty(contentFile))
    _literal.Text =
       "<p style=\"color: red;\">No properties set</p>";
  else
    _literal.Text = "Content file: " + contentFile +
                    ", Text: " + Text;
}
- Now build the project and check you have no errors.
Step 2 - test the control
For this we need a simple web application which can make use of our new
control.
Step 3 - finishing the run-time behaviour of the control
We now need to modify the Load event handler to display the contentFile
when the program runs. It also needs to Use the Text parameter if a
contentFile isn't specified.
- The new Load event handler looks like:
 protected void FileLiteral_Load(object sender, EventArgs e)
{
  if (string.IsNullOrEmpty(contentFile))
    _literal.Text = Text;
  else
  {
    string filePath = Page.Server.MapPath(contentFile);
    if (File.Exists(filePath))
    {
      StreamReader sr =
        new StreamReader(filePath);
      _literal.Text = sr.ReadToEnd();
      sr.Close();
    }
    else
      _literal.Text = Text;
  }
}
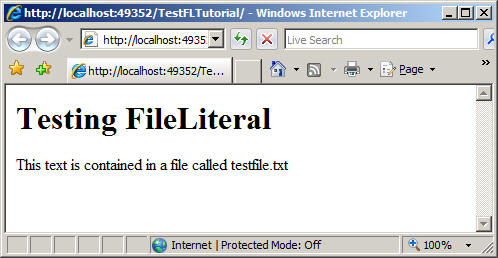
- Run the page and you will notice that the Text value appears (as you
haven't got a contentFile. Create a folder called content in your test
web site and create a new text file in it called testfile.txt.
- Edit the text file to include some simple XHTML. e.g.
<h1>Testing FileLiteral</h1>
<p>This text is contained in a file called testfile.txt</p>
- and run the site.
Step 4 - adding support for property editing in the Properties task
pane.
The control is now fully functional at run-time, however we need to
start adding design time support. Notice that we had to enter the code for
the file literal in Code View and the Text and contentFile properties were
in the Misc section. Also there was no support for selecting the contentFile
from a file dialog. We now add configuration information for the properties
to rectify this.
- We first need to add references to System.ComponentModel and
System.Web.UI at the head of our class file:
using System.ComponentModel;
using System.Web.UI;
- Now we can add the entries to alter the behaviour of our properties
in the Properties task pane. The following entries are placed
immediately before the property declaration for property contentFile:
[EditorBrowsable]
[Browsable(true)]
[Category("Behaviour")]
[DefaultValue("")]
[Description("Specifies the name of the
              file which contains the text for this control.")]
[Editor("System.Web.UI.Design.UrlEditor,
         System.Design, Version=2.0.0.0,
         Culture=neutral, PublicKeyToken=b03f5f7f11d50a3a",
        "System.Drawing.Design.UITypeEditor")]
[UrlProperty]
- The following entries are placed immediately before the declaration
for property Text:
 [Bindable(true)]
[Browsable(true)]
[Category("Behavior")]
[DefaultValue("")]
Step 5 - adding design time behaviour for the control
Our control still has no visible representation in Design view within
VS2008. Our next task is to add a 'Designer' configured especially to
provide the design time interface. A range of Designer classes is available
for working with your controls, or you can create a new Designer based on
the base class. We will use the TextControlDesigner as it most closely
matches the nature of our control, however we will need a reference to
'using System.Web.UI.Design;'.
- We can add a new class file, making sure we use the same namespace,
or we can add a new class at the end of our FileLiteral class. Either
will work:
 public class FileLiteralDesigner : TextControlDesigner
{

}
- We also need to tell our FileLiteral control that it has a designer.
We use the following element immediately before the class declaration:
[Designer(typeof(FileLiteralDesigner))]
- While we are at it we can add other elements which help with the
design time interface. The DefaultProperty element determines which
property is activated when you click on a control for the first time,
and the ToolBoxData element states what html to drop in the code when an
item is dropped on the page from the Toolbox (which we have yet to
consider).
 [DefaultProperty("contentFile")]
[ToolboxData("<{0}:FileLiteral runat=server></{0}:FileLiteral>")]
- To provide a visible representation of the control at design time we
need to override the GetDesignTimeHtml method as follows:
 public override string GetDesignTimeHtml()
{
  return CreatePlaceHolderDesignTimeHtml("");
}
Note: we can use the CreatePlaceHolderDesignTimeHtml
method to produce a grey box with the name and type of the control. We
can replace the empty string with HTML which will be added at the bottom
of the grey box. For example:
 public override string GetDesignTimeHtml()
{
  return CreatePlaceHolderDesignTimeHtml
           ("<hr />Literal linked to file: " +
            ((FileLiteral)Component).contentFile);
}
Note: we have to use the Component property of the designer to access the parents control.
It also need to be cast to the correct type before we can access its properties.
-
If we want we can choose not to use the CreatePlaceHolderDesignTimeHtml
method and put our own code in. For example we may decide to use the
actual text in the contentFile so we get an exact representation of the
final page. This is more complicated, as we have to access the file
system, and work out where the application is at design time. (Server.MapPath
will not work at design time as the page is not being hosted on a
server.) The code below gets the location of the contentFile on the file
system and reads the text from the file and returns it:
 public override string GetDesignTimeHtml()
{
  IWebApplication webApp =
    (IWebApplication)Component.Site.GetService
                                     (typeof(IWebApplication));
  IProjectItem item =
    webApp.GetProjectItemFromUrl
                        (((FileLiteral)Component).contentFile);
  try
  {
    StreamReader sr = new StreamReader(item.PhysicalPath);
    string result = sr.ReadToEnd();
    sr.Close();
    return result;
  }
  catch
  {
    return "";
  }
}
Final step - Publishing the control
We now need to make the control available for developers. A simple
control like ours will just have a single .dll file. We can build it using
the Release configuration and distribute the .dll file (in bin\release) to
developers.
A developer simply places the .dll somewhere in their file systems and
adds a reference to it in their project.
The control can be added into the Toolbox if necessary, thus allowing the
control to be dropped into your Code or Design view for a page.