Working with Databases
You will be familiar with working with Microsoft Access to develop desktop databases with forms and reports. Underlying your database application are tables, relationships and queries. With a web based application, the user interface is provided completely in the form of web pages. Interaction will be through buttons and links. There is a need to simulate the forms and reports concept from Access in the web based environment. Fortunately, ASP.Net provides controls specifically to allow connection to and display of
an underlying database, whether in Microsoft Access, or some other database system. We will look at these controls and how to use them later.
Visual Studio (VS) and Visual Web Developer (VWD) contain a cut down version of Microsoft SQL Server
(SQL Express) which provides all of the underlying database functionality, but
it does not include any management tools (unless you install them separately). However, VS
and VWD do provide a simple set of tools to link to SQL Server, so that you can create databases, tables, relationships, queries etc. It is also possible to create your underlying database using Access, mySQL
or Microsoft SQL Compact Edition. Connecting to other databases is similar (using different connection mechanisms),
but the final display and manipulation of data is independent of the underlying
database system. By default Visual Studio and VWD make use of SQL Server Express
to hold a local database in the App_Data folder within your web application.
This works fine in a development environment, but for a production environment -
and you could argue the same for a development environment where you want to
mirror the real life scenario - you would need to use the resources of an
independent SQL Server. This also applies to the use of other database systems
such as MySQL and Oracle.
Creating your database using local SQL Express
Before you can develop an application you must determine the structure and organisation of your underlying data, and this usually means designing a database. Your data analysis and subsequent normalisation results in a linked table structure with a defined set of fields for each table. From this design we can go through a straightforward construction process to build the database.
- Create a database container (.mdb file in Access, .mdf file in SQL server, database
folder in mySQL)
- Connect to the database.
- For each table in your definition, create the table, and name it.
- For each table create the field definitions, with names, types, sizes. Set the key field(s).
- Establish the relationships between fields in tables.
- Pre-populate tables which have fixed (lookup) data.
- Populate other tables with sample data if required.
We will use this approach to build a website linked to a database with the following structure, which represents a simple stock control database:
Step by Step
- Close any open projects and create a new C# ASP.NET web site called StockControl.
- If you look at the Solution Explorer pane (top right) you will see to following:
- Right click the App_Data item in the list and select 'Add New Item…'
- In the Add New Item dialog box choose
'SQL Server Database' and change the name to Stock.mdf
- The Solution Explorer will switch to Database Explorer mode show the following information:
- Right Click the Tables element in the list and Select 'Add New Table'.
- The Table design view should now show in the Design pane. You can type in new fields, and for each field you can set properties as you enter them. You will end up with a set of fields as follows:
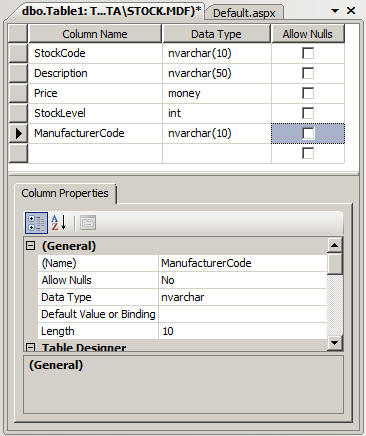
- Select the StockCode Field, right click and choose 'Set Primary Key'.
- Choose menu item File | Save Table 1 and type the name tblStock.
- Repeat stages 6 through 9 to create and save a table to reproduce the field
layout for table tblManufacturer. Note: unless you are
experienced with SQL server stick to the following basic field data types:
nvarchar(50), money, int, float and bit. You can change the length of the
nvarchar text field. The bit data type is used for yes/no or true/false
values.
- At this stage you have created the tables. However, they do not contain any data, and there is no relationship information stored to link the ManufacturerCode field in each table.
If you want to create an enforced relationship between the two tables you can do this using the Database Diagrams feature in VWD. In the Database Explorer right
click Database Diagrams and choose Add New Diagram ... (You may be prompted to install
the Database Diagram feature if you have not used it before. Simply accept the offer
to install the feature.) Choose both tables from the Add Table Dialog and click
Add, and then Close. A new tab opens with a plain database diagram with the two
tables in it, as follows:
- To create the relationship between the ManufacturerCode in both tables select
the grey button to the left of the ManufacturerCode field in the stock table and
drag it to the ManufacturerCode field in the Manufacturer table. You will get a
Tables and Columns dialog describing the relationship you have just created.
Click OK, and then click OK to the Foreign Key Relationship dialog. Type a name
for the diagram (e.g. Relationships) and press OK. Press OK to save the changes
to the tables. You now have a pair of linked tables. - You can add data manually by right clicking a table in the Database Explorer view and selecting Show Table Data. The data appears in Grid view and you can simply type into the grid. If you have setup related fields with referential integrity you will have to populate the Manufacturer table first, as the Manufacturer Code is needed for each stock item.
Note: you can use Windows Explorer to copy the App_Data folder from one website project into another. This makes it easy to experiment with different web page designs without having to create a new database each time.
Download a
ZIP version of the Stock table project.
Using Microsoft SQL CE4
Microsoft SQL Compact Edition v4 is a lightweight file based database system
which has the advantage that it does not rely upon there being an SQL Server
system installed in the deployed sytem. If the web server has SQL CE4 support
installed your website will work with it fine, however, you can provide the SQL
CE binaries in your web site and it will equally well work with no Web Server
based support.
Note: You must have SQL CE4 installed on your development machine in order to
develop web sites using SQL CE4 databases. These notes refer to using Visual
Studio 2010 sp1 with SQL CE4 and building an ASP.NET v4.0 website.
Step by Step
- Open Visual Studio 2010 and create a new ASP.NET v4.0 Empty Web Site.
- Right click the site in Solution Explorer and choose 'Add ASP.NET Folder' and
App_Data.
- Right click your new App_Data folder and choose 'Add New Item ...'
- In the resulting dialog choose SQL Server Compact 4.0 Local Database; name it
Stock.sdf and click 'Add'.
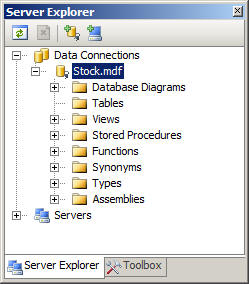
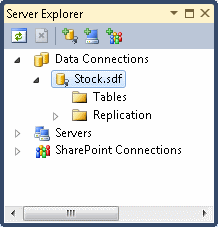
- Now open Server Explorer and expand the Stock.sdf entry. You will see the
following entries:
- From here you can right click 'Tables' and choose 'Create Table'. The Create Table design view should now show in the Design pane.
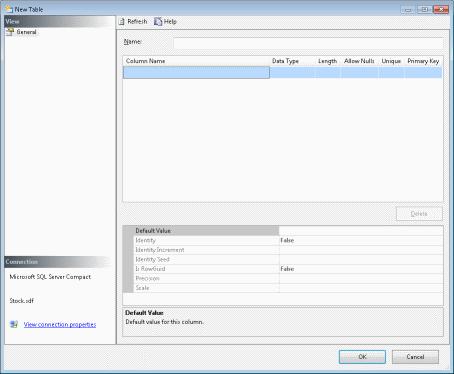
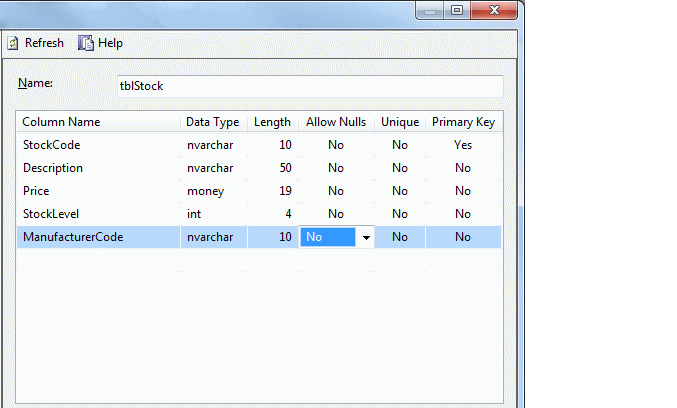
- You can type in new fields, and for each field you can set properties as you enter them.
Make sure you have set the primary key. You will end up with a set of fields as follows:
- Click OK to save the table.
- Repeat stages 6 through 8 to create and save a table to reproduce the field
layout for table tblManufacturer. Note: unless you are
experienced with SQL server stick to the following basic field data types:
nvarchar(50), money, int, float and bit. You can change the length of the
nvarchar text field. The bit data type is used for yes/no or true/false
values.
- At this stage you have created the tables. However, they do not contain any data, and there is no relationship information stored to link the ManufacturerCode field in each table.
If you want to create a master detail relationship (1 to many) linking the
ManufacturerCode fields you must use the Table Properties for the dependent
table. Right click the tblStock table in Server Explorer and choose table
properties.
- Select 'Add Relation' in the Table Properties dialog and fill in the dialog as
in this diagram and click 'Add Columns' to enter the details in the 'Selected
Columns' list:
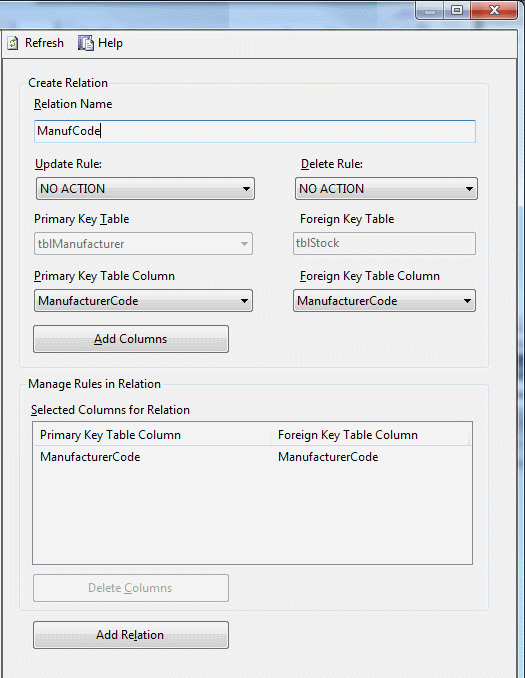 You may want to choose CASCADE or another option in the 'Delete Rule' and
'Update Rule' drop down boxes. This will depend on your particular database
requirements.
You may want to choose CASCADE or another option in the 'Delete Rule' and
'Update Rule' drop down boxes. This will depend on your particular database
requirements.
- Click Add Relation to save the relationship.
- You can add data manually by right clicking a table in the Database Explorer view and selecting Show Table Data. The data appears in Grid view and you can simply type into the grid. If you have setup related fields with referential integrity you will have to populate the Manufacturer table first, as the Manufacturer Code is needed for each stock item.
Using a full SQL Server database
If you have access to an SQL Server or at least a database held on SQL Server
you can make use of a database hosted on an independent database server. The
database server could be accessed by the web server as part of the internal
corporate infrastructure, or it could be internet accessible. Either way you
only need three pieces of information to begin using an SQL server to host your
database. The three pieces are:
- The address of the SQL Server - either:
the full internet domain name if your development machine has to connect to the
server via the internet
or:
a
local machine name if your development machine is in the same local network as
the SQL server. In either case you may need to include the port number if the server is not
hosted on the default port number.
- An SQL server login (username and password), or in the case of an intranet
system you can use the authentication information from the current logged in
user.
- The name of the database.
For example, you may have an account with a web hosting provider who will host
SQL databases and allow you to manage databases and users (up to some predefined
limit based on your subscription). Your provider will give you the server name:
e.g. mssqlserver.hostname.domainname.co.uk,12345 (12345 is the port number)
You will create an empty database (e.g. mydatabase) and a user with the required
permissions to work with the database (e.g. mydbuser with password P@55word)
Armed with this information you can use Visual Studio to set up a connection to
your database for use within your application. To do this you go to Server
Explorer; right click Data Connections and choose Add connection ...
From the resulting dialog you need to choose the appropriate data source
(SQLite, MySQL, Oracle etc. or in our case Microsoft SQL Server (SqlClient)).
Fill in the resulting dialog box, replacing the values with those for your database and server resource:
At this stage you can take up the instructions from step 5 in the
SQL Express section above
- just choose your newly created connection, instead of a local SQL Express
database.
Getting your data onto a web page
Now we have a database, we can think about creating the web page based user interface to it. We will go through a series of stages demonstrating basic elements of database interaction. These will be::
- Viewing table data
- Pagination and sorting
- Editing, deleting and inserting records
- Master detail pages
- Record filtering
Fortunately most of the construction work for the user interface elements is wizard driven.